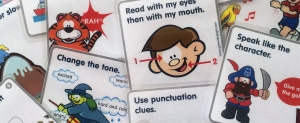
Reading with Expression Cards
August 18, 2014
How many times have you told a young reader to read with more expression, only to have the child look at you strangely? We’ve all said that to children with the same result; dull, robotic reading of potentially exciting texts. Well everyone, get ready for no more monotone! Use this phenomenal resource to get your students reading with expression.